


Monthly Maintenance Tips for Household Blenders
Jun 25,2026
2
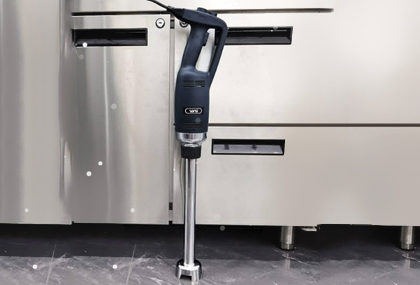
Have you owned your VONCI blender for a long time? Many users report that their units stop working, which is mostly caused by malfunctions resulting from a lack of regular maintenance. As a frequently used kitchen appliance in modern households, blenders are often only used but seldom maintained by most people. Built-up food residues, grease and water stains will not only lead to mold inside the cup, dull blades and overloaded motors, but also trigger various faults such as excessive operating noise, unstable rotation speed, uneven heating, water leakage and circuit tripping. These issues drastically shorten the blender’s service life, and worse still, bacteria may breed and threaten your dietary health. The optimal maintenance cycle for household blenders is a full month with graded fine maintenance every week. Progressive maintenance including weekly basic cleaning, deep stain removal, accessory care and full-unit inspection can keep your blender operating at peak performance all year round.

Before you start monthly maintenance, you must finish the following preparatory steps:
First, cut off the power and let the unit cool down completely. Whether you have just finished heated blending, soybean milk boiling or rice porridge cooking, wait until the blender stops running entirely and the cup cools down to room temperature before unplugging it. Never disassemble or clean the blender while it is powered on or still hot to prevent electric shocks and scalds, as well as cracking or deformation of the hot cup caused by sudden contact with cold water.
Second, prepare dedicated maintenance supplies. We recommend soft sponges, soft bristle brushes, narrow crevice brushes, lint-free cloths, cotton swabs, white vinegar, food-grade baking soda, neutral dish soap and warm water. Avoid steel wool pads, stiff brushes, as well as strong acidic or alkaline cleaners, which can scratch the borosilicate glass cup, wear off the coating on blades and corrode the plastic housing.
Finally, take apart and sort all components. Familiarize yourself with the blender’s structure and separate the cup, lid, silicone gaskets, blade assembly, base and power cord to prevent lost parts or incorrect reassembly. Inspect the exterior of the blender in advance for obvious defects such as cracks, water leaks and frayed wires to lay the groundwork for phased maintenance later on.
Week 1: Basic Cleaning to Remove Daily Residues
Week 1 maintenance refers to light routine cleaning that focuses on clearing leftover food debris, light grease and water stains left after each use to stop residue buildup and mold growth. It is simple, time-efficient and suitable for frequent daily use. After every blending session, fine residues of soybean milk, rice paste, fruit and vegetable fibers and grain powder will stick to the inner cup walls, gaps around blades and the inside of the lid. A quick rinse with plain water cannot fully clear these hidden residues, which will breed bacteria and produce unpleasant odors if left overnight.
Follow these three steps for weekly basic cleaning. Step one: Wash all detachable components. Soak the disassembled cup, lid and feeding port stopper in warm water mixed with a small amount of neutral dish soap. Wipe the inside and outside of the cup with a soft sponge, paying extra attention to fine textures on the cup wall and grooves on the lid. Use a narrow soft brush to sweep fiber residues from gaps around the blade assembly and rotating shaft; do not touch the sharp blade edges with hard objects. Step two: Spot deodorization. For faint food odors, simply rinse with warm water and air-dry naturally. For slightly sticky grease, gently wipe with a little baking soda to cut grease quickly. Step three: Exterior care. Wipe dust and water stains on the base, control panel and power cord with a dry lint-free cloth to keep the unit dry and clean, and stop water from seeping into the internal circuits of the base.
Key maintenance tips for Week 1: Never submerge the motor section of the base in water; only wipe the base with a dry or slightly damp cloth to avoid short circuits caused by water intrusion. All accessories must be fully air-dried before reassembly and storage to avoid mold growth in enclosed humid spaces. Run the blender’s self-cleaning function with clean water after each use to reduce residue buildup and ease weekly cleaning work.
Week 2: Deep Stain Removal to Clear Stubborn Residues in Crevices
After a week of frequent use, tough residues that regular cleaning cannot eliminate will accumulate gradually, including burnt food stuck at the blade roots, thick grease at the cup bottom, food trapped in gasket crevices and limescale on the heating plate. These stubborn stains not only create bad smells and turn black with mold, but also impair heating efficiency and blending performance. Week 2 maintenance targets thorough deep cleaning to eliminate dirt missed by surface washing.
Start with dedicated cleaning for silicone gaskets, the most overlooked parts prone to dirt buildup. Food trapped in gaskets over time will turn black, sticky and smelly. Fully remove the silicone gaskets from the lid and cup rim, soak them in warm baking soda solution for 10 minutes, then scrub the crevices repeatedly with a soft brush to clear embedded residues. Rinse thoroughly and set aside to dry. Next, deep clean the blade assembly and heating plate. For yellow burnt stains left from rice paste and grain porridge on the heating plate, gently wipe with a damp cloth dipped in baking soda powder. Do not scrape hard, as this will damage the non-stick coating on the heating plate. Carefully clear tangled stubborn fibers around the blade rotating shaft with cotton swabs and soft brushes to ensure smooth rotation. Last, remove limescale. In hard water areas, white limescale easily forms on the cup wall. Mix white vinegar and warm water at a 1:3 ratio, pour the solution into the cup and soak for 15 minutes to soften limescale before wiping and rinsing to restore the cup’s transparency.
Key maintenance tips for Week 2: Handle silicone gaskets gently during removal; avoid stretching and deforming them, which will weaken sealing performance and cause subsequent water leaks. Never scrape burnt stains with knives or hard tools, as they can easily scratch the protective layers of the heating plate and blades. Rinse the cup multiple times with clean water after vinegar descaling to prevent acidic residue from corroding the unit and ruining the flavor of future food preparations.
Week 3: Accessory Care to Repair Wear and Extend Service Life
After two weeks of cleaning, most dirt on the blender will have been removed. The focus of Week 3 maintenance shifts from stain removal to accessory upkeep and performance optimization. You will inspect, maintain and fine-tune easily worn parts to prevent minor wear from escalating into severe faults and guarantee stable blender operation. Blades, silicone gaskets, motors and power cords are all vulnerable components. Long hours of high-speed rotation and exposure to high temperatures can lead to dull blades, aging gaskets, frayed wires and dust-clogged motors, which require regular targeted maintenance.
First, care for the blade assembly. Check whether the blade edges are bent, dull or rusted. Remove light rust stains by soaking and wiping with warm vinegar water to keep blades clean and sharp for efficient blending, and prevent motor overload caused by jammed blades. Second, inspect and maintain sealing components. Examine silicone gaskets and anti-overflow strips for yellowing, hardening, cracking or deformation. For mild aging, apply a thin layer of food-grade lubricant to extend their lifespan; replace severely damaged gaskets promptly to stop water or slurry overflow during operation. Third, maintain circuits and the unit housing. Clear dust and lint from cooling vents and gaps on the base with dry cotton swabs to ensure unobstructed heat dissipation. Dust accumulation can cause motor overheating, reduced rotation speed and louder noise. Check the power cord for cracks, sharp bends or loose connections, and organize the cord to avoid squeezing and abrasion. Fourth, inspect the blender cup. Check the glass cup for tiny cracks or chipped coating, and polish worn edges to prevent breakage during use.
Key maintenance tips for Week 3: All accessory inspections and maintenance must be carried out with the unit unplugged and completely dry. Do not apply non-food-grade lubricants to motors or rotating shafts without authorization, as they may melt under high temperatures and contaminate food. Do not continue using aged sealing parts; water and slurry leaks waste ingredients and may damage the base’s internal circuits.
Week 4: Full-Unit Inspection to Troubleshoot Hidden Faults
Week 4 marks the final maintenance session of the month, focusing on comprehensive full-unit testing, overall condition review and complete reassembly care. It wraps up all cleaning, maintenance and inspection procedures to eliminate all hidden faults accumulated over the month, so the blender can enter the next usage cycle in optimal condition. This maintenance session covers four core parts: deep full-unit sanitization, fault risk inspection, complete sterilization and storage care, making it the most critical closing step of monthly maintenance.
Step one: Deep sanitize the entire unit. After finishing cleaning and maintenance in the previous three weeks, reassemble all components, pour clean water mixed with a small amount of white vinegar into the cup, and run the high-temperature cleaning or boiling mode for 10 minutes. This high-temperature treatment sterilizes and deodorizes the cup interior, blade assembly and cavity to fully eliminate residual bacteria and mold as well as accumulated odors. Drain the dirty water and rinse thoroughly with clean water afterward. Step two: Troubleshoot functional faults. Run a no-load test to check responsive buttons, stable rotation speed, normal operating noise and proper heating performance. Watch out for issues including water leakage, excessive shaking, abnormal sounds and circuit tripping during operation. Address abnormal performance immediately: re-clean residues on the rotating shaft for minor jams, or arrange professional repairs for serious malfunctions. Step three: Maintain heat dissipation and the unit base. Clear dust trapped under anti-slip pads on the bottom of the base to ensure stable placement and effective heat dissipation, and stop shaking during operation. Step four: Prepare for storage. Once all inspections are done, fully air-dry every component, reassemble the blender completely, and store it in a dry, well-ventilated spot away from direct sunlight to avoid plastic housing aging and glass cup brittling caused by UV exposure.
Key maintenance tips for Week 4: Monthly high-temperature sanitization is essential to resolve long-term bacterial residue issues. Do not run the no-load test for an extended period, as dry operation without ingredients will wear down blades and strain the motor. Unplug the blender and cover it with a dust cover during long periods of disuse to prevent dust buildup.
Summary of General Maintenance Checklist & Practical Tips for Household Blenders
Based on the four-week graded maintenance workflow, we have compiled a universal maintenance checklist and long-lasting practical tips suitable for ordinary families. These simple, beginner-friendly methods balance thorough cleaning, safe operation and extended equipment lifespan. When it comes to cleaning taboos, never use steel wool pads, strong alkaline cleaners, expose hot glass to sudden cold water or submerge the base, to avoid damaging the blender at the source. For regular maintenance, strictly follow the rule of “quick daily rinsing, graded weekly care and full monthly inspection” to avoid accumulated stains and overlooked hidden faults.
Tips for daily use: Add adequate water when processing hard ingredients such as ice cubes, nuts and bones to prevent dry grinding that overloads the motor and wears blades. When cooking thick rice paste or grain porridge, do not exceed the marked volume line on the cup to avoid slurry overflow and burnt bottoms. Do not move or shake the blender while it is running, and avoid prolonged no-load operation. Tips for accessory care: Replace silicone gaskets every 3 to 6 months, and inspect blade sharpness every six months; swap out aged or dull blades in a timely manner. Tidy the power cord regularly to avoid repeated bending and squeezing. Storage tips: Empty all food residues, air-dry completely and unplug the blender before long-term storage. Keep it in a cool dry area to prevent mold growth and sunlight-induced aging. Fault prevention tips: Confirm all accessories are properly installed before each use. Cut off power immediately if abnormal operation occurs; do not force the blender to run, which can turn minor issues into costly major malfunctions.
The progressive four-week maintenance schedule — basic residue removal in Week 1, deep tough stain cleaning in Week 2, dedicated accessory care in Week 3 and full-unit fault inspection in Week 4 — addresses all common issues arising from blender use. Master these maintenance techniques and stick to a regular care routine to ensure your household blender delivers stable, long-term performance.
